Yes. This is a real thing I made. And it was SO good. And so super easy! You can make them too.
I made a batch of these and gave them to my two roommates and my fiancé for Valentine's Day. They were pretty impressed. (So was I.)
You'll need:
2.5 c. flour
1 c. sugar
a pinch of salt
1/2 t. nutmeg
1/4 t. ground ginger
1/4 t. allspice
1 t. cinnamon
1 t. baking powder
2 eggs
1/2 c. pumpkin puree
1 t. vanilla
8 oz white baking chocolate
Preheat the oven to 350 degrees.
Whisk together flour, sugar, salt, nutmeg, ginger, allspice, cinnamon, and baking powder.
Separately, combine the eggs, pumpkin and vanilla. Slowly add the dry ingredients to the wet ingredients and mix until a dough.
Place the dough on a baking sheet lined with parchment or wax paper. Form a large rectangle that extends the length of the baking sheet but is only about 4-5 inches wide (and about an inch thick).
Bake about 30 minutes. Remove to cool for about 10 minutes.
Cut into the log diagonally to make about 1/2 inch wide pieces with a serrated knife. Put them bak onto the baking sheet with one of the cut sides down and bake for 10-15 more minutes until firm.
Melt your white chocolate over low heat. It should thicken to become a texture similar to frosting. Use a knife to spread the melted chocolate onto one side of the biscotti. Chill until set, about 30 minutes.
THEN EAT THEM. because seriously they're so super good.
Sunday, March 15, 2015
Tuesday, July 8, 2014
Date Night for the Indecisives
My fiancé and I have a really bad habit. Because we are long distance, we have fallen into this habit where we feel like its necessary to go on some super expensive dinner date every time we see each other, which turns out to be just about every other week. Not only has this gotten really expensive, it also has started to feel like a bit of a rut. We aren't adventuring as much as we used to, and we're spending a lot of money that we need to be saving for stuff like weddings, honeymoons, and our future life together.. You know, just trivial things. Not.
SO, I got the idea from various blogs to come up with 75 dates in varying degrees of cheapness (some are a bit more expensive) to help us continue our dates while sprucing them up a little. And to help with the fact that Jake and I both are extremely indecisive, I put them in a mason jar to pick out at random. It was a fun little afternoon of crafting and I wanted to share it with you!!
You'll need:
A list of dates (can be found on various blogs/probably pinned to one of your boards)
A jar
Ribbon
2-3 colors of spray paint
Popsicle sticks
Sharpie
First, you'll need to divide your list into 3 sections: easy free/extremely cheap dates, medium range cost dates, and more expensive dates that require a bit more planning.
Then figure out how many of each category you have and set aside however many popsicle sticks for each and decide which color should represent each. I left the cheapest category plain, the next cheapest were blue and the expensive ones gold.
Then spray paint your sticks, front and back.
While you let them dry, decorate your jar. I hot glued ribbon around it. (It's all the same roll, but I flipped one over.)
Once the sticks dry, write a different date on each one in the corresponding color, and voilé!
Our first date from the date jar was ice cream sundaes. We got all the supplies and made banana splits at home and snuggled (after meeting our wedding planner for the first time!). It was lovely!

SO, I got the idea from various blogs to come up with 75 dates in varying degrees of cheapness (some are a bit more expensive) to help us continue our dates while sprucing them up a little. And to help with the fact that Jake and I both are extremely indecisive, I put them in a mason jar to pick out at random. It was a fun little afternoon of crafting and I wanted to share it with you!!
You'll need:
A list of dates (can be found on various blogs/probably pinned to one of your boards)
A jar
Ribbon
2-3 colors of spray paint
Popsicle sticks
Sharpie
First, you'll need to divide your list into 3 sections: easy free/extremely cheap dates, medium range cost dates, and more expensive dates that require a bit more planning.
Then figure out how many of each category you have and set aside however many popsicle sticks for each and decide which color should represent each. I left the cheapest category plain, the next cheapest were blue and the expensive ones gold.
Then spray paint your sticks, front and back.
While you let them dry, decorate your jar. I hot glued ribbon around it. (It's all the same roll, but I flipped one over.)
Once the sticks dry, write a different date on each one in the corresponding color, and voilé!
Our first date from the date jar was ice cream sundaes. We got all the supplies and made banana splits at home and snuggled (after meeting our wedding planner for the first time!). It was lovely!
Thursday, February 27, 2014
Cake Balls
For Valentine's Day, I wanted to make something sweet. I chose to try out some cake balls. They're super easy and really fun to decorate :)
What you'll need:
a box of chocolate cake mix (and whatever it says you need to make the cake)
a tub of chocolate frosting
a LOT of dark chocolate chips (probably two bags)
icing in a the color of your choice
Bake your cake according to the box instructions.
Once it's cooled, crumble it into fine crumbs. Add the entire tub of frosting. (Yeah, that's right, the whole thing...) Mix it together as best you can with a fork (or your hands...).
Roll into little balls.
Heat up your chocolate to 120 degrees in the microwave, and then let it cool to about 95 degrees. (This is called "tempering;" it makes the chocolate harden a little more cleanly.)
Dip the balls in the chocolate and then set them on wax paper to cool and harden.
Once dry, decorate!
What you'll need:
a box of chocolate cake mix (and whatever it says you need to make the cake)
a tub of chocolate frosting
a LOT of dark chocolate chips (probably two bags)
icing in a the color of your choice
Bake your cake according to the box instructions.
Once it's cooled, crumble it into fine crumbs. Add the entire tub of frosting. (Yeah, that's right, the whole thing...) Mix it together as best you can with a fork (or your hands...).Roll into little balls.
Heat up your chocolate to 120 degrees in the microwave, and then let it cool to about 95 degrees. (This is called "tempering;" it makes the chocolate harden a little more cleanly.)
Dip the balls in the chocolate and then set them on wax paper to cool and harden.
Once dry, decorate!
Thursday, October 31, 2013
Bizcuits.
It's a Southern thang - ya know?
Nashville is the home of the world's best biscuit (at The Loveless Cafe), but unfortunately that's like 30 minutes away from where I live so I just don't have time to eat those biscuits whenever I'd like. So I thought I'd try to make my own. I tried a couple of recipes, but these are the ones I like the best:
You'll need:
1 1/3 c. flour
2 T. sugar
3 t. baking powder
a dash of salt
5 T. cold butter cut into pieces
1/2 c. milk
Preheat your oven to 425 and grease a baking sheet.
Sift the dry ingredients into a bowl so your biscuits will be nice and fluffy
Cut in the butter with a pastry blender (or crumble it together with your hands) until the mixture makes course crumbs.
Pour in the milk, stirring with a fork as you go, and soon a soft dough will form.
Roll out the dough about 1/4 inch thick and cut circles into it, either with a cookie cutter or a knife.
Bake until golden, about 10-12 minutes.
Enjoy with butter or jam or even mixed fruit and whipped cream!
Nashville is the home of the world's best biscuit (at The Loveless Cafe), but unfortunately that's like 30 minutes away from where I live so I just don't have time to eat those biscuits whenever I'd like. So I thought I'd try to make my own. I tried a couple of recipes, but these are the ones I like the best:
You'll need:
1 1/3 c. flour
2 T. sugar
3 t. baking powder
a dash of salt
5 T. cold butter cut into pieces
1/2 c. milk
Preheat your oven to 425 and grease a baking sheet.
Sift the dry ingredients into a bowl so your biscuits will be nice and fluffy
Cut in the butter with a pastry blender (or crumble it together with your hands) until the mixture makes course crumbs.
Pour in the milk, stirring with a fork as you go, and soon a soft dough will form.
Roll out the dough about 1/4 inch thick and cut circles into it, either with a cookie cutter or a knife.
Bake until golden, about 10-12 minutes.
Enjoy with butter or jam or even mixed fruit and whipped cream!
Thursday, October 17, 2013
Easy (and Skinny) Cookies and Cream Shake!
I'm indulgent and I love Oreos. So here you go.
What you'll need:
2 c. fat free vanilla fro yo
1/2 c. skim milk
6 oreos
Throw the fro yo and the milk into a blender for a few seconds until creamy, and then add in the oreos and blend till thoroughly distributed. If you want to spice it up, you could add mint extract or maybe even almond!
It's delicious. It makes either one VERY LARGE glass, or 2 smallish glasses!
Throw some cute straws in there and you've got a precious treat for two. :)
What you'll need:
2 c. fat free vanilla fro yo
1/2 c. skim milk
6 oreos
Throw the fro yo and the milk into a blender for a few seconds until creamy, and then add in the oreos and blend till thoroughly distributed. If you want to spice it up, you could add mint extract or maybe even almond!
It's delicious. It makes either one VERY LARGE glass, or 2 smallish glasses!
Throw some cute straws in there and you've got a precious treat for two. :)
Sunday, September 29, 2013
Sparkling Strawberry Lemonade
While fall is rapidly approaching, I thought I'd sprinkle in another warm weather recipe that might be nice on those beautiful 70 degree days we've been experiencing.
It sounds a bit involved, but it only took me maybe 15 minutes to prepare and then you're enjoying it in no time.
You'll need:
1 full c. chopped strawberries
2 T. sugar
1 t. lemon juice
a pinch of salt
2 T. cold water
and separately:
2/3 c. sugar
1 c. very hot water
1-1 1/4 c. freshly squeezed lemon juice (about 6 lemons)
4 1/2 c. cold seltzer
To make the strawberry component, combine those first five ingredients in a blender. (I used my magic bullet.) Puree until smooth.
For the lemonade, combine your hot water and sugar in the pitcher you intend to use (the water being hot will help the sugar to dissolve more rapidly). Add the lemon juice, strawberry mixture, and seltzer.
To make a fancy glass, I used one of my squeezed-out lemon wedges and rubbed it around the rim of a wine glass and then dipped it in sugar.
Serve on ice or chilled.
Enjoy!
It sounds a bit involved, but it only took me maybe 15 minutes to prepare and then you're enjoying it in no time.
You'll need:
1 full c. chopped strawberries
2 T. sugar
1 t. lemon juice
a pinch of salt
2 T. cold water
and separately:
2/3 c. sugar
1 c. very hot water
1-1 1/4 c. freshly squeezed lemon juice (about 6 lemons)
4 1/2 c. cold seltzer
To make the strawberry component, combine those first five ingredients in a blender. (I used my magic bullet.) Puree until smooth.
For the lemonade, combine your hot water and sugar in the pitcher you intend to use (the water being hot will help the sugar to dissolve more rapidly). Add the lemon juice, strawberry mixture, and seltzer.
To make a fancy glass, I used one of my squeezed-out lemon wedges and rubbed it around the rim of a wine glass and then dipped it in sugar.
Serve on ice or chilled.
Enjoy!
Thursday, September 12, 2013
Orange Cranberry Scones
I promised a more exciting scone... and I'm delivering!
Okay, seriously, these were delicious. So make them.
Here's what you need:
2 not quite full cups of flour
1 1/2 T. baking powder
1/3 c. sugar
1/2 t. salt
5 T. butter, cut up
5 T. margarine, cut up
grated rind of 1 orange
1/3 c. craisins/dried cranberries
a little more than 1/2 c. buttermilk.
Preheat your oven to 425. Grease/flour a large baking sheet. Combine your dry ingredients in a large bowl and cut in with a pastry cutter until you have crumbs.
Add the orange rind and craisins. Gradually stir in your buttermilk.
The mixture should be very moist and sticky. It will be kind of hard to work with, but so worth it... your scones will be incredibly moist and tasty!
Roughly make triangles with the dough/batter on your cookie sheet and bake until the tops are hard, about 15-20 minutes.
Enjoy!!!
Okay, seriously, these were delicious. So make them.
Here's what you need:
2 not quite full cups of flour
1 1/2 T. baking powder
1/3 c. sugar
1/2 t. salt
5 T. butter, cut up
5 T. margarine, cut up
grated rind of 1 orange
1/3 c. craisins/dried cranberries
a little more than 1/2 c. buttermilk.
Preheat your oven to 425. Grease/flour a large baking sheet. Combine your dry ingredients in a large bowl and cut in with a pastry cutter until you have crumbs.
Add the orange rind and craisins. Gradually stir in your buttermilk.
The mixture should be very moist and sticky. It will be kind of hard to work with, but so worth it... your scones will be incredibly moist and tasty!
Roughly make triangles with the dough/batter on your cookie sheet and bake until the tops are hard, about 15-20 minutes.
Enjoy!!!
Wednesday, August 21, 2013
Scones!
My boyfriend, Jake, asked me to learn how to make scones... so I did! They're not triangles like you'd see at Starbucks or something, instead they are more traditional; they're circles, like you'd find at tea time with the Queen :) They're whole wheat with raisins... not very exciting, but they were DELICIOUS with blackberry jam. I'm thinking of trying some different scones with a fruit in it.. maybe orange? Stay tuned...
What you'll need:
1/4 c. cold butter
2 c. whole wheat flower
1 c. all purpose flour
2 T. sugar
1/2 t. salt
2 1/2 t. baking soda
2 eggs
3/4 c. buttermilk
1/4 c. raisins
Preheat your oven to 400 degrees. Grease and flour a baking sheet (there's a kind of Pam specifically for baking that has flour in it).
Cut your butter up into small pieces.
Stir up your dry ingredients (flours, sugar, salt, baking soda). Then add in the butter and use a pastry blender (or your hands) to make big crumbs.
In a separate bowl, whisk your eggs and buttermilk. Take out 2 T. for glazing and set aside in a small bowl.
Stir the egg mixture into the dry ingredients so that it holds together. Stir in the raisins.
Roll out your dough, about 3/4 in. thick. Use a circle cookie cutter to stamp out your perfect scones. Put them on the cookie sheet and brush with your glaze.
Bake them until golden, around 10 min.
Enjoy!
They're real easy to split in half to put butter or jam on :)
What you'll need:
1/4 c. cold butter
2 c. whole wheat flower
1 c. all purpose flour
2 T. sugar
1/2 t. salt
2 1/2 t. baking soda
2 eggs
3/4 c. buttermilk
1/4 c. raisins
Preheat your oven to 400 degrees. Grease and flour a baking sheet (there's a kind of Pam specifically for baking that has flour in it).
Cut your butter up into small pieces.
Stir up your dry ingredients (flours, sugar, salt, baking soda). Then add in the butter and use a pastry blender (or your hands) to make big crumbs.
In a separate bowl, whisk your eggs and buttermilk. Take out 2 T. for glazing and set aside in a small bowl.
Stir the egg mixture into the dry ingredients so that it holds together. Stir in the raisins.
Roll out your dough, about 3/4 in. thick. Use a circle cookie cutter to stamp out your perfect scones. Put them on the cookie sheet and brush with your glaze.
Bake them until golden, around 10 min.
Enjoy!
They're real easy to split in half to put butter or jam on :)
Sunday, August 18, 2013
Tropical Sangria
It seems summer is rapidly coming to a close, (I start graduate school tomorrow - eek!) so I thought I'd post one last fun summer recipe. I made this a few weeks ago, and my boyfriend and I LOVED it and drank it for a few nights in a row... but watch out, it's a little alcohol heavy so it'll getchya!
You'll need:
1 bottle of Chardonnay (750 ml), you can use a different white wine, but a cheap chardonnay will keep it from getting too sweet
1 12 oz. can of frozen lemonade
1/2 c. of light rum (I used Bacardi because that's what we had on hand)
1/2 c. of triple sec
3/4 c. simple syrup (take 1/2 c. sugar and 1/2 c. of water and heat in microwave until completely clear, stirring occasionally, allow to cool to room temp and it will become a syrup)
1 20 oz. can of pineapple chunks in juice
1 apple, unpeeled, cored, and cut into chunks (I used a granny smith)
1 orange, in thin slices
1 lemon, in thin slices
1 c. strawberries, halved
1 can of lemon-lime soda (I used Squirt, but anything would work)
In a pitcher (a gallon size is what I used), pour in your wine, lemonade, rum, triple sec, and simple syrup. Stir it up pretty good so that the ingredients mix together rather than separating. Pour in the entire can of pineapples (including the juice). Then add in all your fruits. Stir and refrigerate -- the longer the better. If you let it sit, the fruit soaks up the mix and becomes softer, and the flavors from the fruit mix in the drink. Don't add in the soda until right before you serve so that it doesn't go flat. Pour over ice.
And you're done! Yum :)
You'll need:
1 bottle of Chardonnay (750 ml), you can use a different white wine, but a cheap chardonnay will keep it from getting too sweet
1 12 oz. can of frozen lemonade
1/2 c. of light rum (I used Bacardi because that's what we had on hand)
1/2 c. of triple sec
3/4 c. simple syrup (take 1/2 c. sugar and 1/2 c. of water and heat in microwave until completely clear, stirring occasionally, allow to cool to room temp and it will become a syrup)
1 20 oz. can of pineapple chunks in juice
1 apple, unpeeled, cored, and cut into chunks (I used a granny smith)
1 orange, in thin slices
1 lemon, in thin slices
1 c. strawberries, halved
1 can of lemon-lime soda (I used Squirt, but anything would work)
In a pitcher (a gallon size is what I used), pour in your wine, lemonade, rum, triple sec, and simple syrup. Stir it up pretty good so that the ingredients mix together rather than separating. Pour in the entire can of pineapples (including the juice). Then add in all your fruits. Stir and refrigerate -- the longer the better. If you let it sit, the fruit soaks up the mix and becomes softer, and the flavors from the fruit mix in the drink. Don't add in the soda until right before you serve so that it doesn't go flat. Pour over ice.
And you're done! Yum :)
Friday, July 19, 2013
Sweet Sesame Bread
Jake and I have been eating this for breakfast the past few days... the recipe makes two small loaves... one for you and one to give away! (That's what I did anyway. Or you could just eat them both)
It has a really interesting flavor... it's sweet, but with the distinctive sesame flavor added in. I like it.
You'll need
2/3 c. toasted sesame seeds
2 c. flour
2 1/2 t. baking powder
1 t. salt
4 T. butter/margarine, at room temp.
2/3 c. sugar
2 eggs, at room temp.
grated rind of 1 lemon
1 1/2 c. milk
Preheat your oven to 350 degrees. Take two loaf pans (8x4 or something around that) and grease them.
Stir together your flower, salt, and baking powder, and then add in the sesame seeds -- but reserve 2 T of the sesame seeds for later.
Separately, cream the butter or marg. and sugar together until fluffy. Beat in your eggs and then stir in the lemon rind and milk. The consistency will look strange... that's okay, it's just the milk and lemon reacting.
Pour the milk mixture over your dry ingredients and just blend with a spoon. Pour half of the batter into your pan and sprinkle 1 T of your sesame seeds over the top. (Then you can either repeat for your second pan, or bake this one and reuse it.)
Monday, July 15, 2013
Asian Spicy Honey Grilled Shrimp
I made this delicious dinner for my boyfriend and mom last week, and it was a hit so I thought I'd share it with you all.
What you'll need:
2 lb. raw, shelled, de-veined shrimp
1 T. minced garlic
1/4 c. minced ginger (I used that kind that comes in a tube)
a little less than 1/4 c. hot chili paste (Sriracha)
about 1/2 c. sweet chili paste (I used an entire 4 oz. jar of Thai kitchen roasted red chili paste - found in your international foods aisle)
1 c. honey
1 c. lime juice
1/2 t. salt
1 t. black pepper
1 c. canola oil
Combine marinade ingredients together in a large bowl. Whisk it together until it is a cohesive substance. At this point, taste the marinade and see if it is to your liking. If you want it spicier, add more Sriracha. Set aside about a cup of the marinade and then pour the rest over shrimp (which you have rinsed thoroughly). Refrigerate for a few hours (preferably over night).
When ready to cook, place your shrimp on skewers. Put them on the grill and quickly brush more marinade on each skewer (from your reserve). Allow to cook only a couple of minutes before quickly flipping and marinating the other side. You will be able to tell they are ready because they'll turn completely pink. Should only take about 3 minutes on each side.
Enjoy! It's that easy.
What you'll need:
2 lb. raw, shelled, de-veined shrimp
1 T. minced garlic
1/4 c. minced ginger (I used that kind that comes in a tube)
a little less than 1/4 c. hot chili paste (Sriracha)
about 1/2 c. sweet chili paste (I used an entire 4 oz. jar of Thai kitchen roasted red chili paste - found in your international foods aisle)
1 c. honey
1 c. lime juice
1/2 t. salt
1 t. black pepper
1 c. canola oil
Combine marinade ingredients together in a large bowl. Whisk it together until it is a cohesive substance. At this point, taste the marinade and see if it is to your liking. If you want it spicier, add more Sriracha. Set aside about a cup of the marinade and then pour the rest over shrimp (which you have rinsed thoroughly). Refrigerate for a few hours (preferably over night).
When ready to cook, place your shrimp on skewers. Put them on the grill and quickly brush more marinade on each skewer (from your reserve). Allow to cook only a couple of minutes before quickly flipping and marinating the other side. You will be able to tell they are ready because they'll turn completely pink. Should only take about 3 minutes on each side.
Enjoy! It's that easy.
Wednesday, July 10, 2013
Blueberry Streusel Bread
I went to the lake over the 4th and we had a lot of guests at our lake house, so I thought I'd lighten the load on my mom a little and bring down a little something to munch on for breakfast. This is what I came up with, and it was a HIT. Enjoy!
You'll need:
a square baking dish (8x8 or 9x9)
4 T. butter at room temp
3/4 c. sugar
1 egg at room temp
1/2 c. milk
2 c. flour
2 t. baking powder
1/2 t. salt
2 cup fresh blueberries
(and for the crumble topping:)
1/2 c. of sugar
1/2 c. flour (ish)
1/2 t. cinnamon
4 T. butter cut into small pieces
Preheat your oven to 375 F. Grease your baking dish.
Cream the butter with sugar until nice and light. Add in your egg and beat it.
Mix in the milk until blended and, and then add in the dry ingredients (flour, baking powder, salt) and stir to blend. Add in your blueberries, and stir to distribute.
Pour all that into your baking dish and then even it out at least a little bit.
To make the topping, but the topping ingredients into the bowl. I started with about 1/3 c. of flour and added more in until the consistency was right: you'll need to sort of knead the ingredients together with your hands until it starts becoming more crumbly.
Once you've gotten a good consistency, spoon the topping over your batter.
Stick it in the oven for about 45 minutes, or until you can stick a knife (or fork or toothpick or cake tester if you're really fancy) into the middle and it comes out clean.
Enjoy!
You'll need:
a square baking dish (8x8 or 9x9)
4 T. butter at room temp
3/4 c. sugar
1 egg at room temp
1/2 c. milk
2 c. flour
2 t. baking powder
1/2 t. salt
2 cup fresh blueberries
(and for the crumble topping:)
1/2 c. of sugar
1/2 c. flour (ish)
1/2 t. cinnamon
4 T. butter cut into small pieces
Preheat your oven to 375 F. Grease your baking dish.
Cream the butter with sugar until nice and light. Add in your egg and beat it.
| This is after I added the milk, before the dry ingredients. I thought it looked weird, so I wanted to assure you all that it should! |
Pour all that into your baking dish and then even it out at least a little bit.
To make the topping, but the topping ingredients into the bowl. I started with about 1/3 c. of flour and added more in until the consistency was right: you'll need to sort of knead the ingredients together with your hands until it starts becoming more crumbly.
Once you've gotten a good consistency, spoon the topping over your batter.
Stick it in the oven for about 45 minutes, or until you can stick a knife (or fork or toothpick or cake tester if you're really fancy) into the middle and it comes out clean.
Enjoy!
Tuesday, July 2, 2013
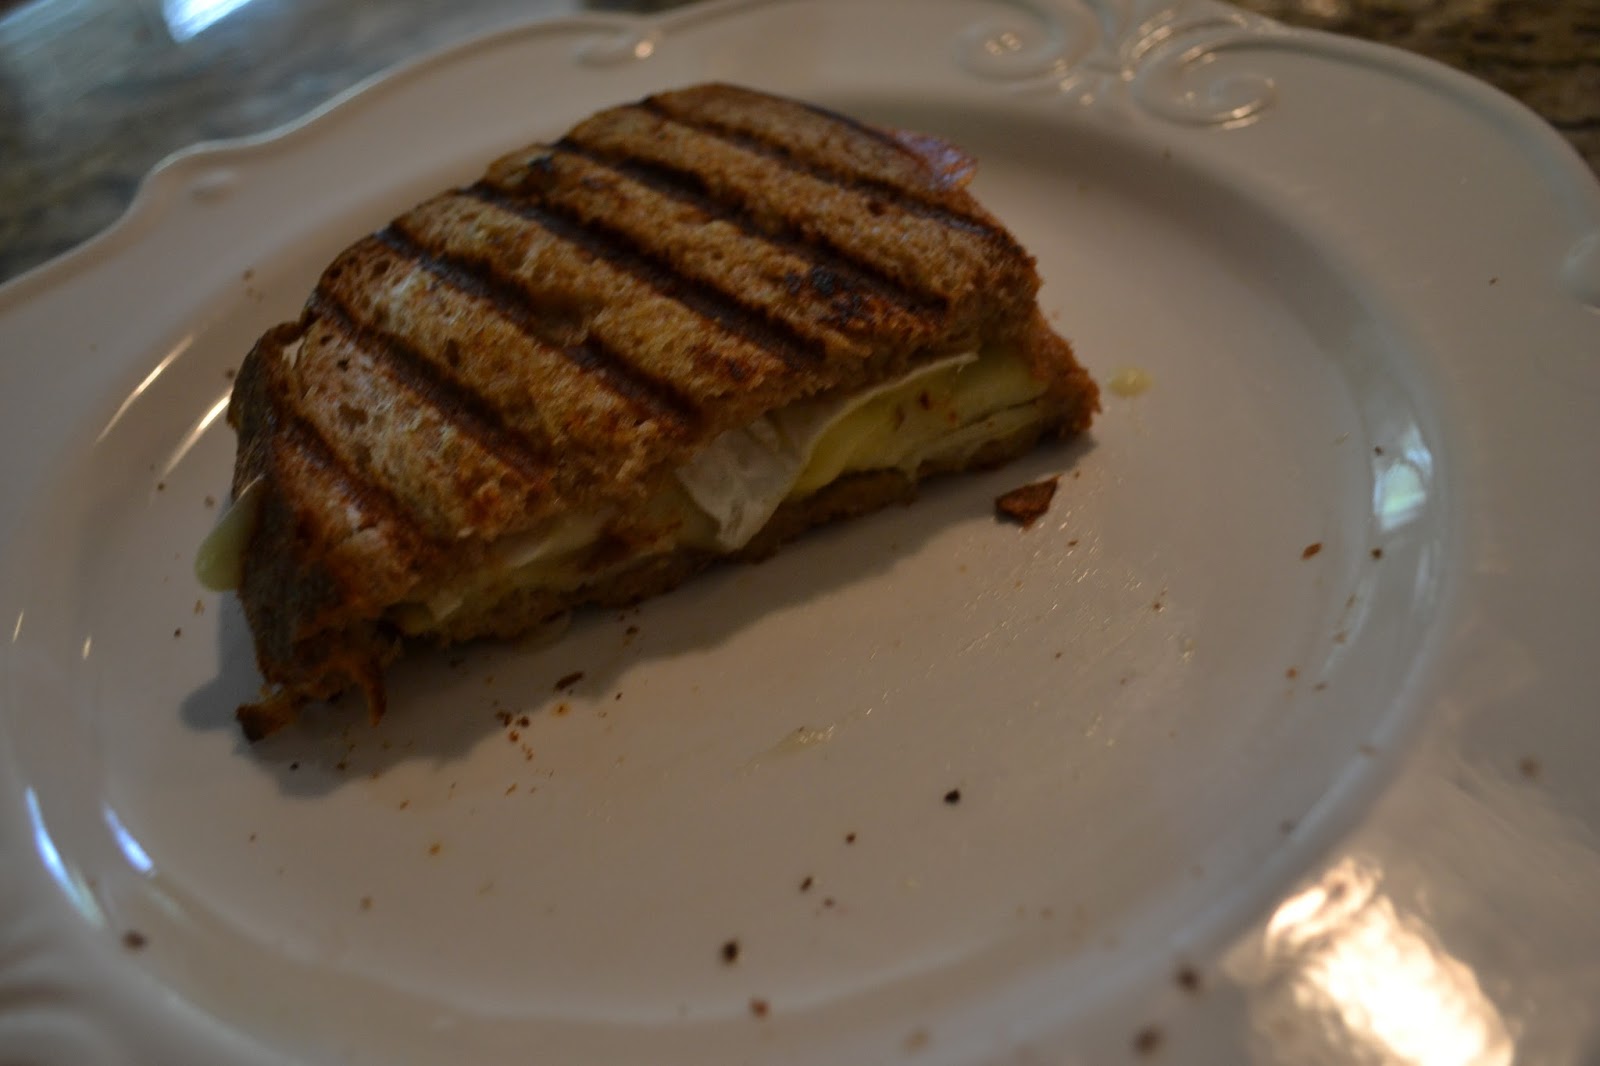
Apple and Brie Panini
I recently found out that my mom has this panini maker she never uses. It's so cute (light green and for the stovetop), so I decided I had to find a reason to use it. What I came up with turned out DELICIOUS, so I thought I'd let you all in on the recipe! It's inspired by the Fideaux sandwich at Fido in Nashville, TN.
What you'll need:
Some kind of bread (I used a multi-grain for health's sake, but Italian would be delicious)
a Fuji apple
Brie cheese
apple butter (can use homemade or buy, next to apple sauce at the grocery store with jams + jellies)
butter
Spread apple butter on one side of each slice and regular butter on the outsides. Thinly slice your apple and put those on top of the apple-buttered side of one of the slices. Place thin slices of the brie on top (or spread it if it's the spreadable kind). Put the top of the sandwich on, and once that's done place it in the panini maker! (Could do stovetop too, like a grilled cheese). Flip after just a minute or two and let it crisp up (you want the cheese to be melty).
Then... enjoy!
What you'll need:
Some kind of bread (I used a multi-grain for health's sake, but Italian would be delicious)
a Fuji apple
Brie cheese
apple butter (can use homemade or buy, next to apple sauce at the grocery store with jams + jellies)
butter
Spread apple butter on one side of each slice and regular butter on the outsides. Thinly slice your apple and put those on top of the apple-buttered side of one of the slices. Place thin slices of the brie on top (or spread it if it's the spreadable kind). Put the top of the sandwich on, and once that's done place it in the panini maker! (Could do stovetop too, like a grilled cheese). Flip after just a minute or two and let it crisp up (you want the cheese to be melty).
Then... enjoy!
| I forgot to take a picture of the final result until I had already eaten half! Whoops! Yum :) |
Thursday, May 30, 2013
Orange Honey Bread
My roots are in baking.
I have always loved to bake, and long before I discovered that I rather liked cooking and crafting, I knew that I was quite good at producing baked goods.
So I may go on a little stream of baking.
I recently baked this bread for a sorority ceremony I held at my apartment, and I couldn't believe how good it was! Enjoy. (I'm not including pictures because the ones I took were awful. Also, everything is pretty self-explanatory!)
You'll need:
2.5 c. flour
2.5 t. baking powder
1/2 t. baking soda
1/2 t. salt
2 T. margarine
1 c. honey
1 egg
grated rind of one orange
3/4 c. orange juice
3/4 c. walnuts, chopped
Preheat your oven to 325 degrees and get out a 9x5 loaf pan and spray it down with Pam.
then get your egg out so that it will be at room temp.
Sift together the flour, baking powder, baking soda, and salt.
Beat the margarine until soft and then stir in the honey until they are blended. Separately, lightly beat the egg. Then stir it in until the honey-butter mixture. Add the orange rind and stir it thoroughly. Fold in the dry ingredients to the honey mixture in three batches, interspersing three batches of the oj. Once fully combined, stir in the walnuts.
Pour it into your prepared pan and bake it for about 60-70 minutes, until you can insert something (a cake-tester, a toothpick, a fork) and it comes out clean. Trust me, you want to wait. This is bread, not cookies so you do NOT want it to be gooey.
Once you take it out, let it stand for about 10 minutes to set, and then flip it over and it should fall right out of the pan!
EAT.
I have always loved to bake, and long before I discovered that I rather liked cooking and crafting, I knew that I was quite good at producing baked goods.
So I may go on a little stream of baking.
I recently baked this bread for a sorority ceremony I held at my apartment, and I couldn't believe how good it was! Enjoy. (I'm not including pictures because the ones I took were awful. Also, everything is pretty self-explanatory!)
You'll need:
2.5 c. flour
2.5 t. baking powder
1/2 t. baking soda
1/2 t. salt
2 T. margarine
1 c. honey
1 egg
grated rind of one orange
3/4 c. orange juice
3/4 c. walnuts, chopped
Preheat your oven to 325 degrees and get out a 9x5 loaf pan and spray it down with Pam.
then get your egg out so that it will be at room temp.
Sift together the flour, baking powder, baking soda, and salt.
Beat the margarine until soft and then stir in the honey until they are blended. Separately, lightly beat the egg. Then stir it in until the honey-butter mixture. Add the orange rind and stir it thoroughly. Fold in the dry ingredients to the honey mixture in three batches, interspersing three batches of the oj. Once fully combined, stir in the walnuts.
Pour it into your prepared pan and bake it for about 60-70 minutes, until you can insert something (a cake-tester, a toothpick, a fork) and it comes out clean. Trust me, you want to wait. This is bread, not cookies so you do NOT want it to be gooey.
Once you take it out, let it stand for about 10 minutes to set, and then flip it over and it should fall right out of the pan!
EAT.
Friday, April 19, 2013
OWL NAILS.
So, I realize this blog is supposed to be dedicated to cooking and crafting, but I did the craziest thing with my nails the other week and I wanted to share it with you! I have actually never done anything very creative with my nails before, but I decided to branch out and do something fun. I happen to love owls (like a lot) so I thought I'd try to transform my hands into a little owls nest. (That was a weird sentence.
Here's how I did it!
I started out by painting my nails with 2 coats of a base color. I chose a metallic-y brown color, but if you want purple owls, then by God, paint those nails purple.
Then I painted a white half circle on the bottom half of each nail. It looked like this:
Next I made two yellow dots (with the end of the nail polish brush) just above the white stomach as a base for eyes. While that was drying, I took a tooth pick and put little black lines all over their white bellies to accentuate feathers.
Here's how I did it!
I started out by painting my nails with 2 coats of a base color. I chose a metallic-y brown color, but if you want purple owls, then by God, paint those nails purple.
Then I painted a white half circle on the bottom half of each nail. It looked like this:
Then I put a smaller white dot in the middle of the yellow dot.
Then I took a toothpick and some orange polish to make little lines for beaks and feet.
Then I put black dots for the pupils for their little owlie eyes.
Then I took a toothpick and some orange polish to make little lines for beaks and feet.
Then I put black dots for the pupils for their little owlie eyes.
Add a topcoat and you're finished!!!! Aren't they the cutest?! I got lots of compliments, and it only took about 20 minutes in front of the TV!
Thursday, December 13, 2012
Homemade lip balm!
It's the Christmas season folks!! That means that you'll be spending waaaaay too much money on gifts and food right about now. Help your budget a little and do some DIY! This is an easy project that makes a great stocking stuffer or part of a gift. It only takes about 10 minutes once you have your supplies!!
What you'll need:
beeswax. you can find it at a craft store or some health stores.
a carrier oil. i used jojoba oil, but sunflower or castor would work fine. you can find it at health food stores.
an essential oil. whichever you choose! peppermint might be fun. i used a lavender + tea tree oil mixture. again, you can find this at health food stores.
lip balm canisters. at any craft store.
melt three teaspoons of beeswax and five teaspoons of the carrier oil and mix together. i did this using a double boiler.
take it off the heat and add 5-6 drops of essential oil and mix it in.
(if you want to add a sweeter flavor, mix in a teaspoon of honey. for color, put a tiny bit of lipstick in it.)
before it cools, pour it into the canister and allow it to cool.
you're done!
again, it's a really easy project... and cheap!
What you'll need:
beeswax. you can find it at a craft store or some health stores.
a carrier oil. i used jojoba oil, but sunflower or castor would work fine. you can find it at health food stores.
an essential oil. whichever you choose! peppermint might be fun. i used a lavender + tea tree oil mixture. again, you can find this at health food stores.
lip balm canisters. at any craft store.
melt three teaspoons of beeswax and five teaspoons of the carrier oil and mix together. i did this using a double boiler.
take it off the heat and add 5-6 drops of essential oil and mix it in.
(if you want to add a sweeter flavor, mix in a teaspoon of honey. for color, put a tiny bit of lipstick in it.)
before it cools, pour it into the canister and allow it to cool.
you're done!
again, it's a really easy project... and cheap!
| my finished project! the recipe makes three to four. |
Monday, July 30, 2012
Orange candles.
I recently heard a rumor that you could use citrus fruits to make mini oil lamps, so I thought I'd give it a go. Here are the results:
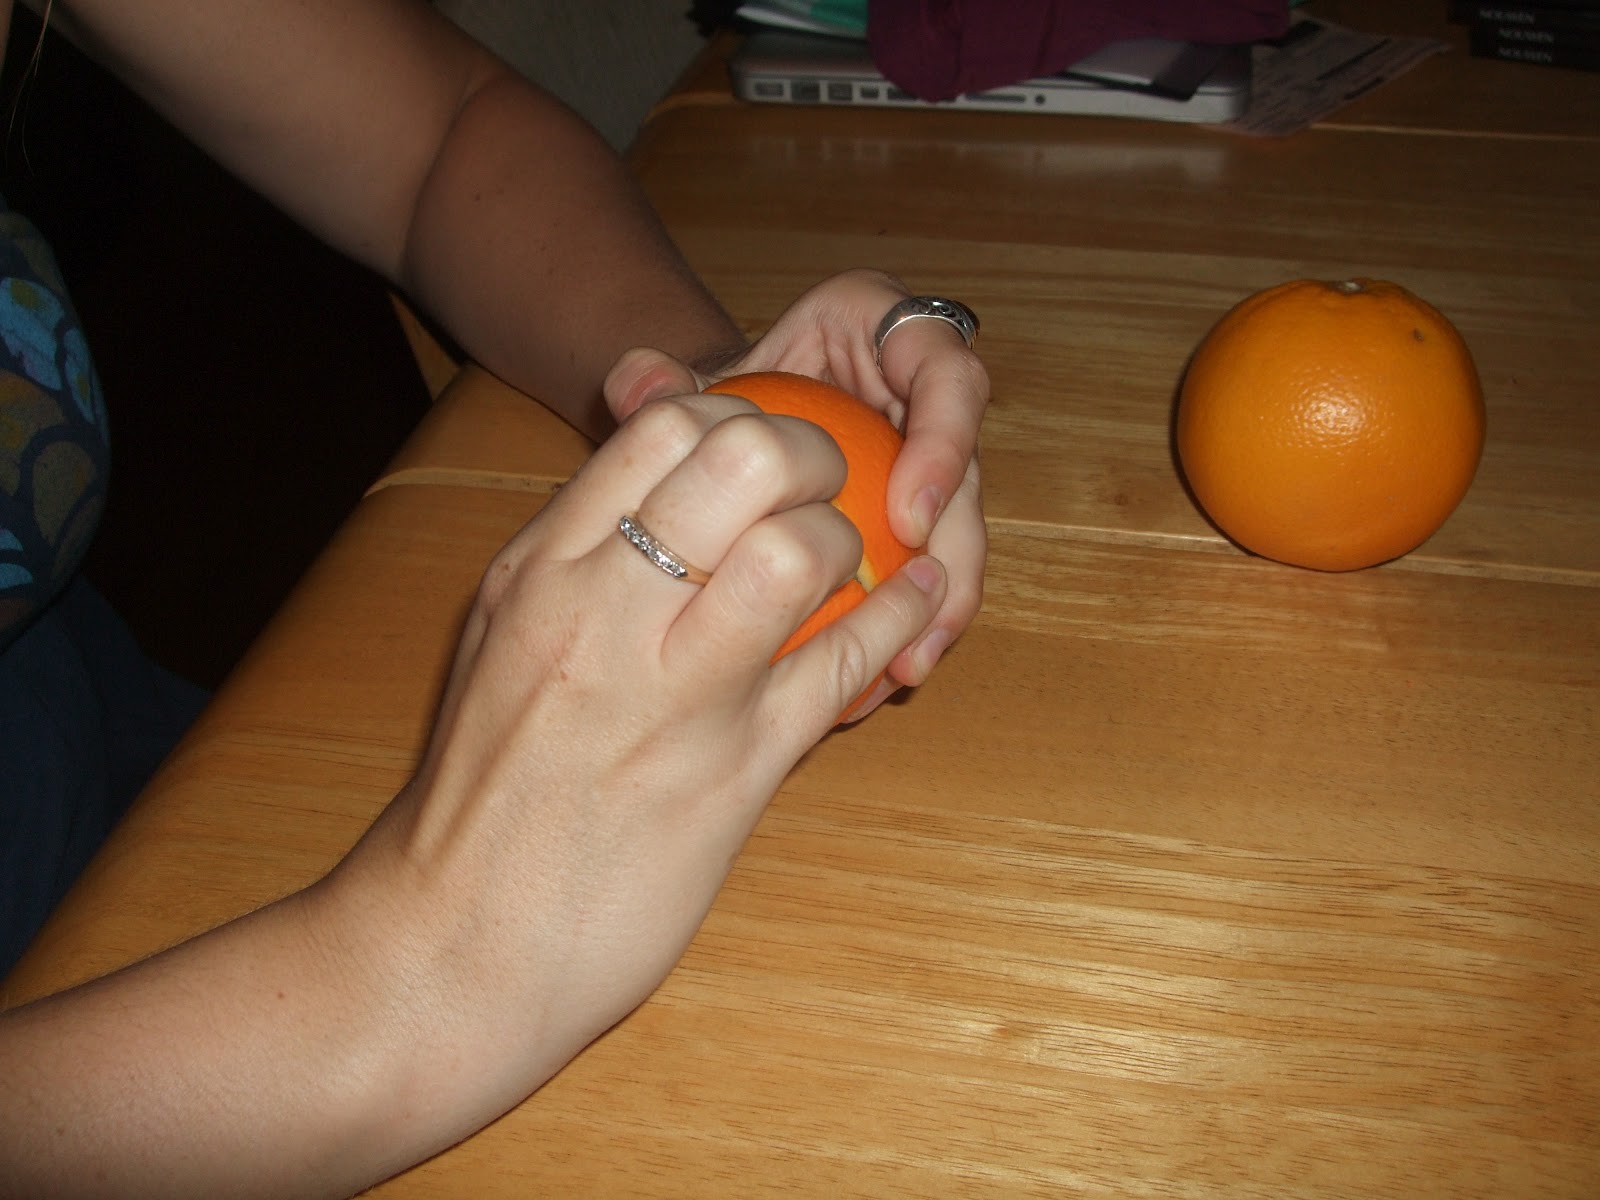
I first cut the orange in half, and took out the fruit from the rind. (and obviously ate it). I cut away some of the extra white gunk, but you really need a good "wick" for it to work properly. The wick is the white part that is in the middle of the fruit. Once you have it hollowed out, fill it with olive oil, almost to the top of the wick. Then light the wick! It sometimes takes some time to light, so you may need to hold it in the fire a bit. On the top half of the orange, cut out a big hole. I cut mine in a star for decoration.
Here's some pictures of my two tries. Both worked, but the second had a better wick so it worked out better (and burned for hours! I even relit it several different days).
I first cut the orange in half, and took out the fruit from the rind. (and obviously ate it). I cut away some of the extra white gunk, but you really need a good "wick" for it to work properly. The wick is the white part that is in the middle of the fruit. Once you have it hollowed out, fill it with olive oil, almost to the top of the wick. Then light the wick! It sometimes takes some time to light, so you may need to hold it in the fire a bit. On the top half of the orange, cut out a big hole. I cut mine in a star for decoration.
Here's some pictures of my two tries. Both worked, but the second had a better wick so it worked out better (and burned for hours! I even relit it several different days).
Subscribe to:
Posts (Atom)