Thursday, December 13, 2012

Homemade lip balm!

It's the Christmas season folks!!  That means that you'll be spending waaaaay too much money on gifts and food right about now.  Help your budget a little and do some DIY!  This is an easy project that makes a great stocking stuffer or part of a gift.  It only takes about 10 minutes once you have your supplies!!

What you'll need:
beeswax. you can find it at a craft store or some health stores.
a carrier oil. i used jojoba oil, but sunflower or castor would work fine.  you can find it at health food stores.
an essential oil.  whichever you choose!  peppermint might be fun.  i used a lavender + tea tree oil mixture.  again, you can find this at health food stores.
lip balm canisters.  at any craft store.

melt three teaspoons of beeswax and five teaspoons of the carrier oil and mix together.  i did this using a double boiler.
take it off the heat and add 5-6 drops of essential oil and mix it in.
(if you want to add a sweeter flavor, mix in a teaspoon of honey.  for color, put a tiny bit of lipstick in it.)
before it cools, pour it into the canister and allow it to cool.
you're done!

again, it's a really easy project... and cheap!
my finished project!  the recipe makes three to four.

Monday, July 30, 2012

Orange candles.

I recently heard a rumor that you could use citrus fruits to make mini oil lamps, so I thought I'd give it a go.  Here are the results:

I first cut the orange in half, and took out the fruit from the rind. (and obviously ate it).  I cut away some of the extra white gunk, but you really need a good "wick" for it to work properly.  The wick is the white part that is in the middle of the fruit.  Once you have it hollowed out, fill it with olive oil, almost to the top of the wick.  Then light the wick!  It sometimes takes some time to light, so you may need to hold it in the fire a bit.  On the top half of the orange, cut out a big hole.   I cut mine in a star for decoration.

Here's some pictures of my two tries.  Both worked, but the second had a better wick so it worked out better (and burned for hours! I even relit it several different days).

Monday, July 23, 2012

Pennette alla Carrettiera

Two updates in one day?  I knowww.  But I'm a little behind on my crafting and cooking.
I recently made this dish for my parents, and with a salad and some bread, it was a fan favorite.

Carrettiera is a spicy tomato sauce that can go on whatever pasta you would like.  I put it over mini penne noodles.

You'll need:
About a pound of pasta
6 large ripe tomatoes (I used Roma)
A clove of garlic (don't cheat!  use fresh garlic)
4 T. EVOO
a pinch of chili flakes (I used more so it would be a little spicier)
4 T. of Pecorino Romano cheese
15 leaves of basil
Salt

Chop and grate.  Chop those tomatoes, garlic and thinly slice the basil.  Grate the cheese so you'll be ready to go later.
Heat the olive oil in a large pan on the stove.  Once it's warm, add the garlic and chili flakes and brown the garlic.
Add the tomatoes and a lot of salt and then let it cook until it's just a thin sauce.  This will take a while, but it's worth it!  To make it go a little faster, keep mashing those tomatoes with a wooden spoon as you stir.
Add in the basil (keep a few out if you want to garnish it!) and cook another few minutes.  This is the right point to taste the sauce and see if it needs more salt or spice.
Partially cook the pasta, but before it is al dente (only slightly chewy), strain it and cook it with the sauce.  When it's completely cooked, mix in your pecorino and plate it!
Here's what the sauce should look like:
Buon appetito!

Panzanella - summer salad.

Here goes my first cooking post!!
Panzanella is a cold bread salad from Tuscany.  It's a recipe I learned while studying in Italy.  Sometimes it's made with just bread, tomatoes, and onions, but I added cucumbers and lettuce.  Here's how to make it!! (It sounds kind of weird, but trust me, it's delicious and wonderful for hot summer days.)

You need:
about a pound of bread (you can find "Italian bread" at most grocery stores... this will work best)  It's best if the bread is stale.
4 tomatoes (chopped)
1 medium red onion (sliced)
a lot of basil
1 cucumber
some lettuce
1/2 c. EVOO
1 cup white wine vinegar
black pepper
salt

Start by breaking the bread in chunks and then soaking it in 5 cups of cold water and a 1/2 cup of the vinegar for an hour.  If the bread is fresh, reduce this to a half hour.  Simultaneously soak the sliced onions in a bowl with 2 tablespoons of vinegar for a half an hour.

While those are soaking, chop your veggies!
Once the bread is soaked, squeeze it by hand (kinda gross i know) and then put it in the bowl that you want to serve the salad in.

Dress the bread with ample salt, even more pepper, the olive oil, and the remaining vinegar.
Add in your chopped vegetables and some lettuce as well.  Drain your onions and mix those in too.  Finally add some basil leaves.  Mix it all up, breaking the bread into smaller pieces.  I did this with my hands mostly (don't worry they were clean!), but you could do it with salad servers also.
Make sure you refrigerate this for at least an hour; you want it to be cold and fresh!
Once done, it should look something like this:

Put some basil leaves on top for presentation.
Enjoy!


Friday, June 29, 2012

My first post!

So, while I have not literally become a housewife (still unmarried!), for all intents and purposes, I have become inspired to become crafty.  I'm sure that some of that has sprung from the Pinterest revolution, but I think I've always wished I were more artistic.  Since I can't become artistic with practice, I have decided to go crafty.  This blog will include a lot of projects that I have done as well as some cooking.  So I guess this is a craft/food blog.  Or just domestic.

In August, I will be moving into my first apartment.  No more dorm life, no more living at home.  My very own place.  I will be living in a beautiful complex in Hillsboro Village in Nashville, TN with just me and my monster cat, Dietrich.  This has inspired me to begin to think about decoration.  The first thing I wanted to get was a dresser.  If you know how many clothes I have (too many/not enough), you will soon realize that it's not big enough to hold all of them.  I'm planning to use it mostly for storage/underwear/etc.

I purchased a dresser from a furniture artist named Caleb in Lee's Summit, MO.  He had already distressed and stained it which made my job a lot easier.  He also showed me some of his other work - bookshelves, tables, mirrors, etc. and it was really great stuff.  So feel free to shoot him an email if you're interested in seeing/buying some of his pieces.  He does custom work as well.

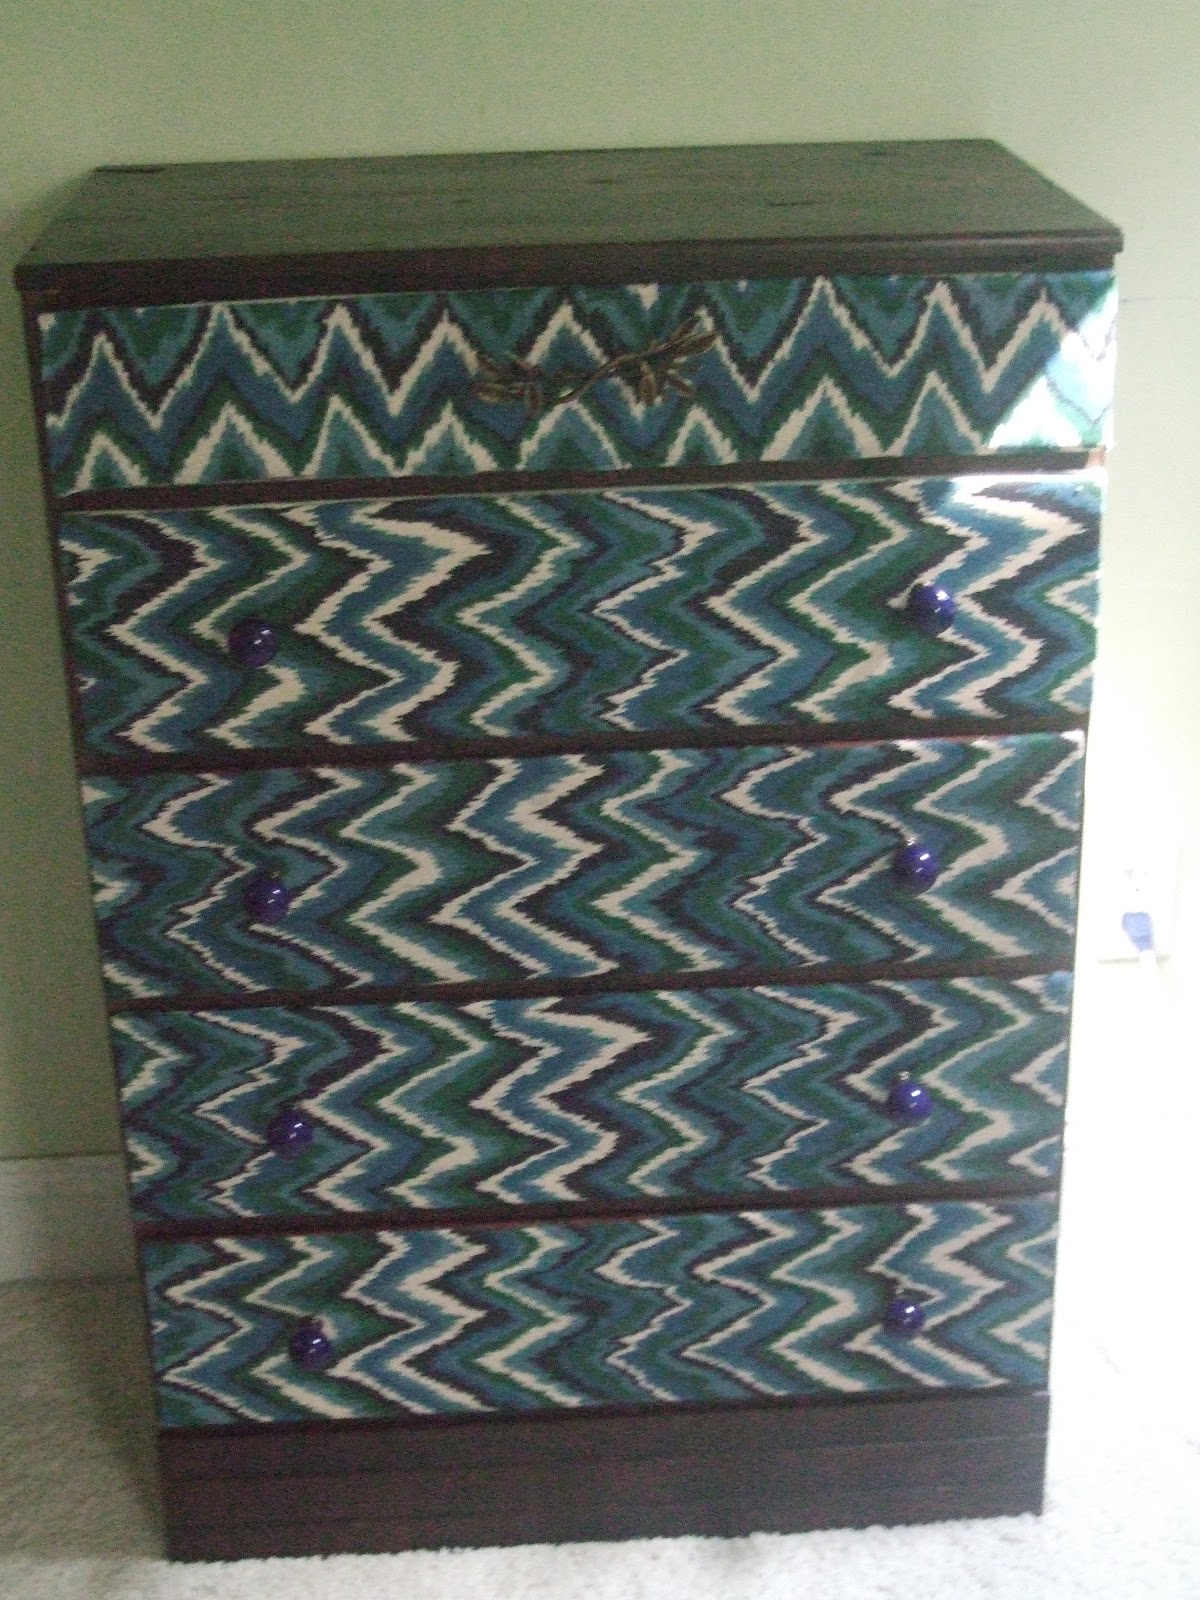
I brought my dresser home and began by cutting out fabric in the shapes and sizes of the individual drawers.  I bought some great ikat-patterned fabric from Joann's, and used Mod Podge to adhere it to the front of the shelves (after removing knobs).  I just put the Mod Podge straight on the wood, smoothed out the fabric, and then put some more over the top.

Once the fabric was on, we let it dry and then took it outside to spray it with some finishing spray so that the drawers wouldn't feel sticky.  We let that dry as well.

We then bought some really freaking cute knobs from Anthropologie as well as a beautiful handle for the smaller top drawer.  We put them on, and ta da! We were done.

Here are some pictures of the finished project:

the beautiful handle/top drawer
the other handles
The whole thing!